Homemade Ice Cream In A Bag: The Ultimate No-Churn, Kid-Friendly Treat!
Imagine this: a hot summer day, a craving for something sweet and cold, but no ice cream in the freezer and no expensive ice cream maker in sight. What if we told you that you could whip up a batch of delicious, creamy homemade ice cream in a matter of minutes, using nothing more than a few common kitchen ingredients and a plastic bag? Sounds like magic, right? Well, it's not! Welcome to the wonderful world of "Ice Cream in a Bag."
This ingenious method is not just a recipe; it's an experience. It's a fun activity that doubles as a cool science experiment, perfect for keeping the whole family entertained. Forget complicated machines and long waiting times; this quick, no-churn method is about to become your new favorite way to satisfy those ice cream cravings. "Did you know that you can make ice cream in a bag?!" It's true, and it's incredibly simple!
What Exactly is "Ice Cream in a Bag"?
At its core, ice cream in a bag is exactly what it sounds like: ice cream made inside a sealed plastic bag. It's a brilliant hack that leverages the principles of freezing point depression to create a delightful frozen treat without any fancy equipment. "Create a delicious summer treat simply by shaking cream, sugar, and vanilla extract in a plastic Ziploc bag!" You simply combine your ice cream base ingredients in one bag, place that bag inside a larger bag filled with ice and salt, and then shake, shake, shake!
The salt lowers the melting point of the ice, making it much colder than 32°F (0°C). This super-cold slush then rapidly freezes the liquid mixture inside the smaller bag, transforming it into creamy ice cream. "Homemade ice cream that’s easy to make without an expensive ice cream maker. This ice cream in a bag recipe uses a quick, no-churn method that can be fun for the whole family." It's a simple, yet incredibly effective, way to enjoy homemade goodness.
Why You'll Love Making Ice Cream in a Bag
There are countless reasons why this method has become a sensation, especially among families and outdoor enthusiasts. Here are just a few:
1. Unbelievable Simplicity & Speed
- Minimal Ingredients: "You only need 5 ingredients to make this homemade ice cream in a bag." Yes, that's right – typically heavy cream (or milk/half-and-half), sugar, vanilla extract, ice, and salt. That's it!
- No Special Equipment: "No ice cream maker? No problem!" This recipe uses a quick, no-churn method that can be fun for the whole family. You don't need an expensive machine taking up counter space.
- Lightning Fast: "5 Minute Ice Cream In A Bag is an easy, sweet treat the whole family can get in on making." While it might take a bit longer than 5 minutes of active shaking, you can often have a delicious treat ready "in less than 15 minutes for a deliciously fun treat!" If you're "low on ice cream in your freezer, it’s a great way to make your own treat!"
2. A Fantastic Activity for Kids
"Kids will love seeing how quickly they can make their own ice cream!" This isn't just a dessert; it's an engaging, hands-on project. "This is such a fun activity for kids in the summer!" It's a wonderful way to teach them about basic chemistry and the states of matter in a delicious way. "Learn how to make ice cream in a bag with milk or half and half is a fun way to get the wiggles out while having a sweet treat. Put on those little chef hats and let’s create a delightful treat!" The shaking motion itself is a great way for kids to burn off some energy, and "Kids can" truly get involved in every step.
3. Perfect for Camping & Outdoor Adventures
"The perfect camping dessert! This ice cream in a bag recipe allows you to make homemade ice cream right at your campsite using fewer than 5 ingredients." Imagine the delight of fresh, cold ice cream after a day of hiking or exploring. "Easy ice cream in a bag is a great recipe for kids on a campout." It requires no electricity and minimal cleanup, making it ideal for the great outdoors.
4. Customization & Control
"Making your own homemade ice cream gives you control over the ingredients and what you want in your ice cream bag." Want less sugar? More vanilla? A specific type of milk? You're in charge! This also means you can make it "when you need ice cream in a pinch" and tailor it exactly to your taste or dietary preferences. "The recipe includes milk, cream, and sugar, plus some time" for your personal touch.
How to Make Ice Cream in a Bag: Your Step-by-Step Guide
Ready to get shaking? Here's how you can create your very own delicious ice cream in a bag:
What You'll Need:
- For the Ice Cream:
- 1 cup heavy cream, half-and-half, or whole milk (heavy cream yields the creamiest results)
- 2 tablespoons granulated sugar
- 1/2 teaspoon vanilla extract (or other flavorings like mint, almond, etc.)
- Pinch of salt (optional, but enhances flavor)
- For the Freezing Process:
- 1 gallon-sized Ziploc bag (or similar sturdy, sealable plastic bag)
- 1 quart-sized Ziploc bag (or similar sturdy, sealable plastic bag)
- About 4-6 cups of ice cubes
- 1/2 cup rock salt (or any coarse salt like kosher salt – table salt works but less effectively)
- Gloves or a kitchen towel (to protect your hands from the cold!)
Instructions:
- Combine Ice Cream Ingredients: "In the smaller bag, combine the half-and-half (or milk), sugar, and vanilla extract." If using heavy cream, pour that in. Add a tiny pinch of salt if desired. "Squeeze out excess air and seal" the bag tightly. Make sure it's really sealed to prevent leakage. Alternatively, "Mix ice cream ingredients in a large ziploc bag: Pour the cream and/or half-and-half or milk into a bag with the sugar and vanilla extract (or" your chosen flavor.
- Prepare the Ice Bath: Fill the larger gallon-sized Ziploc bag about halfway with ice cubes. Then, pour the 1/2 cup of rock salt over the ice. The salt is crucial for lowering the ice's temperature.
- Assemble the Bags: Place the sealed smaller bag containing your ice cream mixture inside the larger bag with the ice and salt. Again, try to squeeze out any excess air from the large bag and seal it securely.
- Shake, Shake, Shake!: Now for the fun part! Put on your gloves or wrap the bag in a kitchen towel to protect your hands from the extreme cold. Begin shaking the bag vigorously. "All you need is heavy cream, milk, sugar, salt, and vanilla—and the energy to shake the bag for 10 minutes." Keep shaking, squishing, and massaging the bag for about 7-10 minutes. You'll notice the mixture inside the smaller bag starting to thicken and solidify.
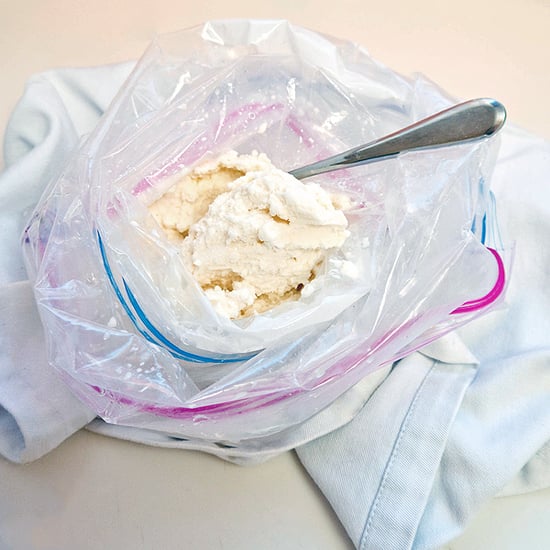
- Check for Consistency: After about 7-10 minutes, open the large bag and inspect the smaller bag. Your ice cream should be firm but still pliable, much like soft-serve. If it's not quite there, reseal and continue shaking for a few more minutes.
- Enjoy Your Creation: Once your ice cream has reached the desired consistency, carefully remove the smaller bag from the larger bag. Wipe off any salt water from the outside of the inner bag before opening it. "You can eat the ice cream right out of the bag or serve it over homemade cobbler." Spoon it into a bowl, add your favorite toppings, or simply grab a spoon and dig in! "You can make a tasty" treat tailored just for you.
Tips for the Perfect Ice Cream in a Bag
- Use Good Quality Bags: Sturdy, freezer-grade Ziploc bags are essential to prevent leaks.
- Shake Vigorously: The more consistent and energetic your shaking, the faster and more evenly your ice cream will freeze.
- Don't Skimp on Salt: The rock salt is key to lowering the ice's temperature. More salt generally means colder ice and faster freezing.
- Protect Your Hands: The ice and salt mixture gets incredibly cold. Gloves or a towel are a must!
- Experiment with Flavors: Beyond vanilla, try chocolate syrup, cocoa powder, almond extract, peppermint extract, or even a spoonful of fruit puree.
- Add Mix-Ins: Once the ice cream is formed, you can open the bag and stir in chocolate chips, sprinkles, chopped nuts, or fresh fruit pieces for extra deliciousness.
Making ice cream in a bag is more than just a recipe; it's a memorable activity that brings smiles and delicious results. It’s a testament to how simple ingredients and a little bit of energy can create something truly special. Whether you're looking for a fun summer activity for the kids, a unique camping dessert, or just a quick, homemade treat without the fuss of an ice cream maker, this method is a winner. "Enjoy this simple dessert that doubles as a cool science experiment."
So, gather your ingredients, grab your bags, and get ready to shake your way to a delightful, creamy, homemade ice cream experience. "Did you know that you can make ice cream in a bag?!" Now you do!
Final Summary:
This article explored the fun and easy method of making "ice cream in a bag," a no-churn, homemade dessert that requires minimal ingredients and no special equipment. It highlighted the simplicity, speed, and kid-friendly nature of the activity, making it perfect for summer fun, camping trips, or simply satisfying a sudden ice cream craving. A detailed step-by-step guide was provided, covering ingredients, equipment, and the shaking process, along with useful tips for achieving the perfect creamy consistency. The article emphasized the joy of creating a delicious treat while also engaging in a cool science experiment, encouraging readers to try this delightful and customizable dessert.

Easy Ice Cream in a Bag Recipe - A Few Shortcuts
Easy Homemade Ice Cream in a Bag | POPSUGAR Moms

Ice cream in a bag recipe — Elm Farm
